Generate Job Aid from Content in Scribe360
Use Scribe360 to turn pasted or drafted content into an AI-generated Job Aid. You’ll open the Scribe360 workspace, create a new document, select the Job Aid output style, generate a preview, review the rendered Job Aid in the document viewer before saving or closing.
How It Works
-
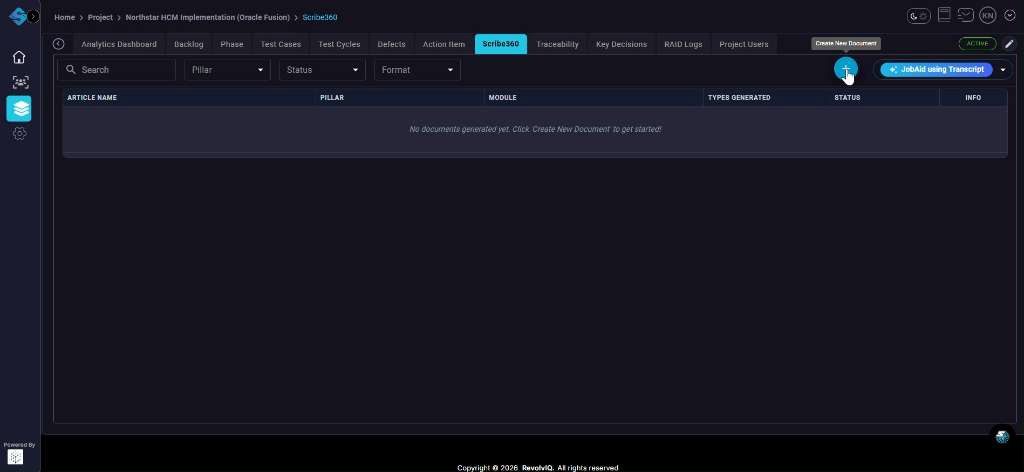
Open the Scribe360 workspace
From your project navigation, click the Scribe360 tab to open the document list area.
-
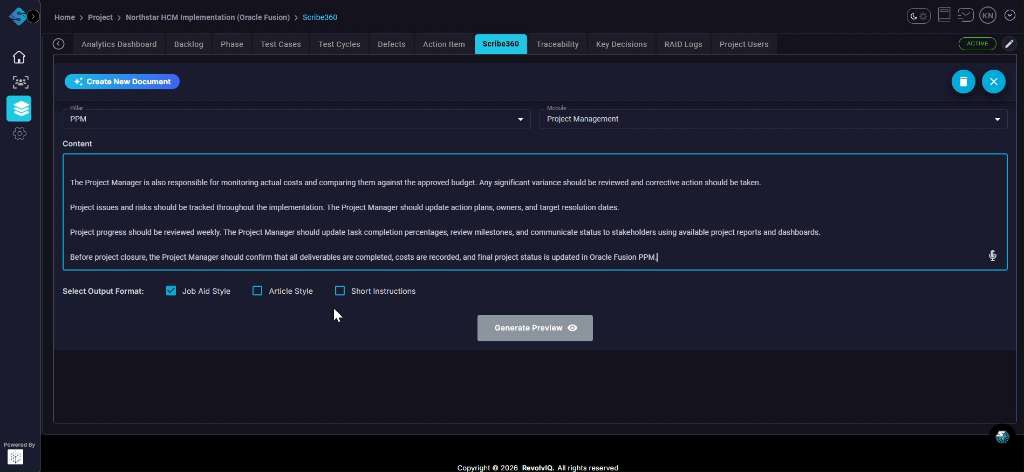
Create a new document and enter your source content
Click Create New Document, choose the appropriate Pillar and Module, then paste or type your content into the Content field.
-
Select the Job Aid output format
Under Select Output Format, check Job Aid Style (and leave other formats unchecked unless you want multiple outputs).
-
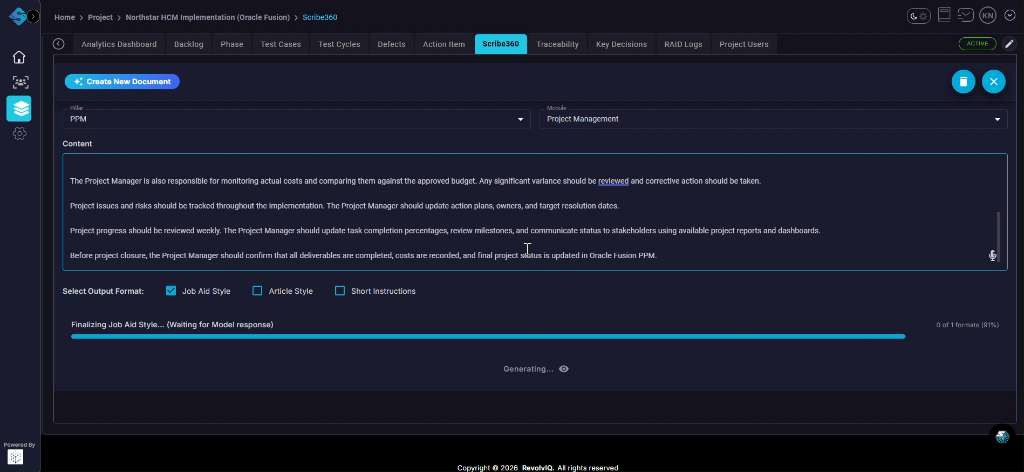
Generate the Job Aid preview
Click Generate Preview to start the AI generation process.
-
Wait for generation to complete
Monitor the progress indicator until the system finishes creating the Job Aid.
-
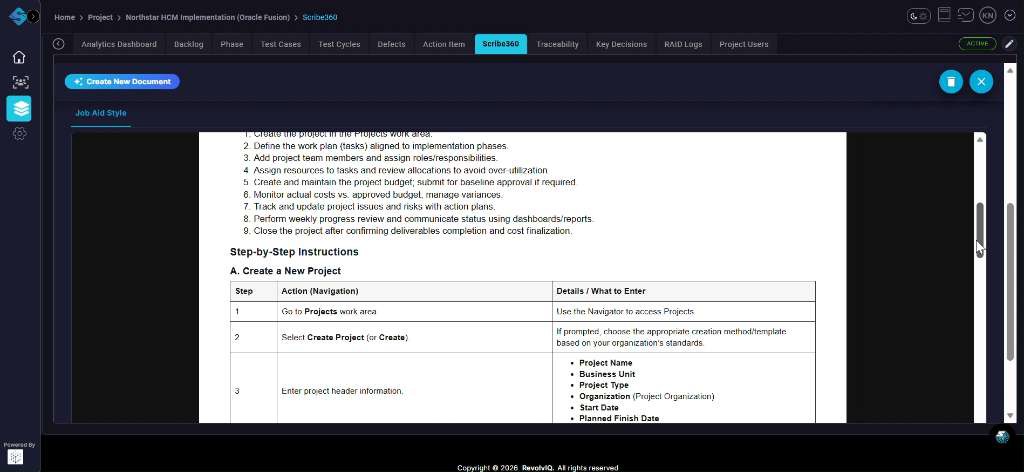
Review the rendered Job Aid in the preview viewer
When the preview loads, scroll through the document to verify Steps, Tables, and formatting match your expectations.
-
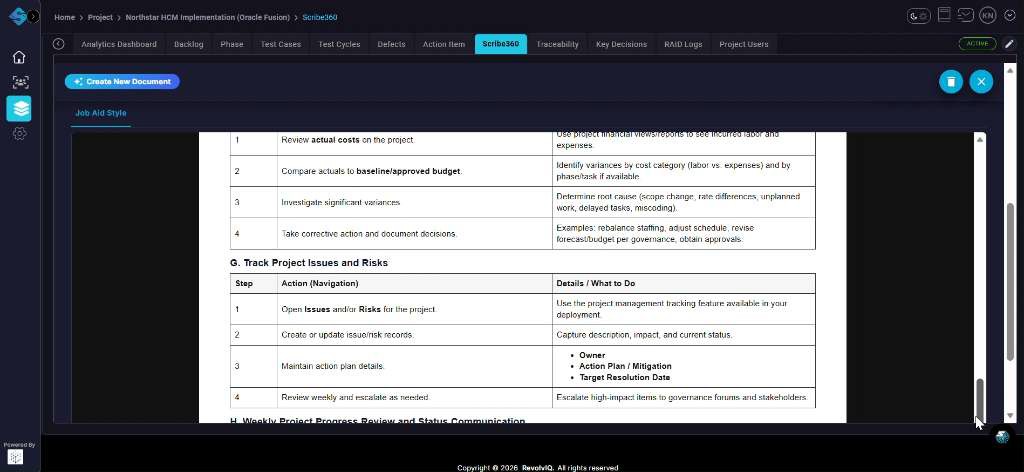
Spot-check additional sections by scrolling
Scroll further down to validate mid-document sections (for example, risk/issue tracking or other operational steps) are complete and correctly sequenced.
-
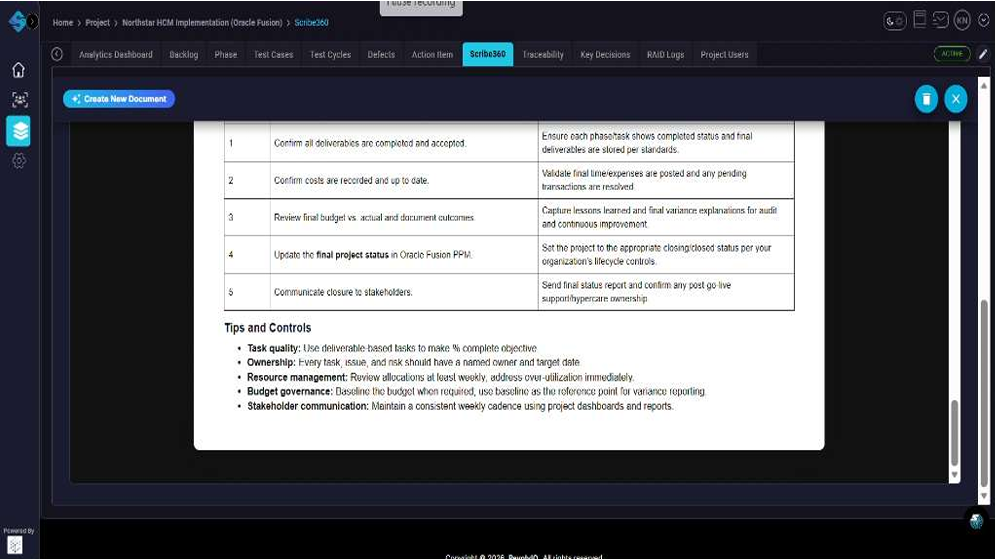
Confirm the closing steps and tips/controls
Scroll near the end to confirm the Job Aid includes closure activities and any tips/controls, then decide whether to keep, revise, or regenerate.