Getting Started Guide
User Guide
SaaSMap
Introduction
Welcome to the SaaSMap Getting Started Guide. This guide is designed to help Application Admins complete the basic setup required before end users can start using the application.
It provides an overview of the initial configuration steps needed to ensure the application is ready for use, allowing users to get started smoothly and make the most of SaaSMap’s features from the outset.
Logging into the Application
Click on the URL received in your registered email or enter the URL provided to you by the Camptra team in the browser.
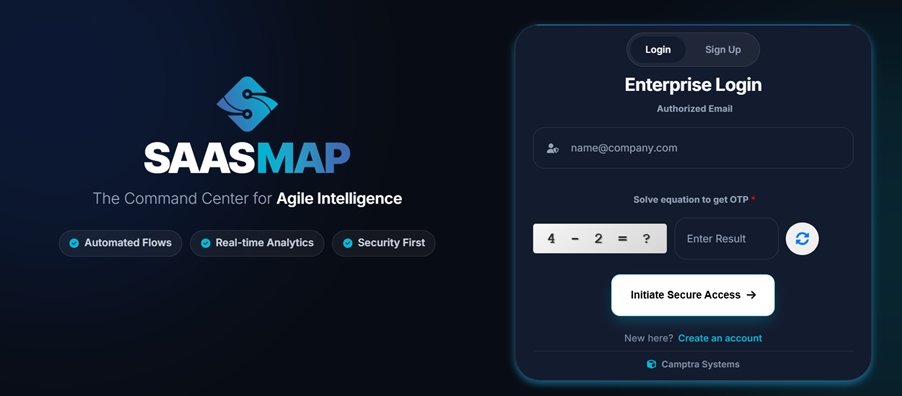
Login into the application by entering your registered email id, solving the equation and then entering the OTP sent to your registered email in the next screen.

After successful login you will be navigated to the Home page.
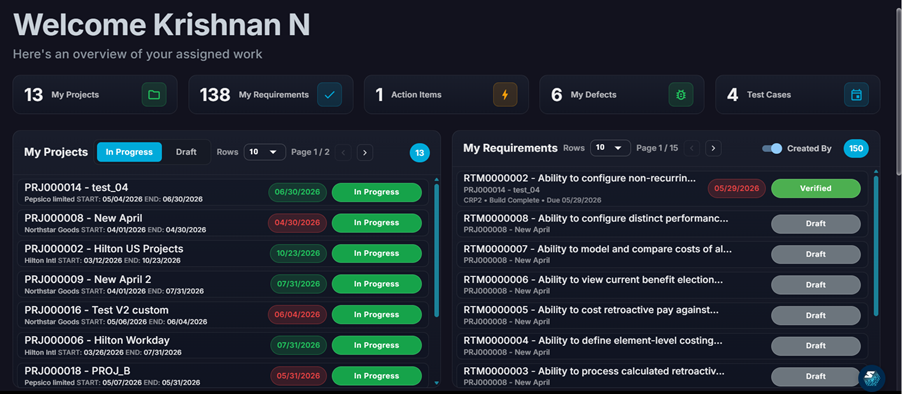
This is a typical view of the Home Page. Note that the details you will see will differ based on your assigned role.
Configuring the Software details
Click on the ‘Settings’ icon in the Left Hand menu
This will open up the Application Settings which will allow you to view and setup various application level parameters.
You will see the following screen.
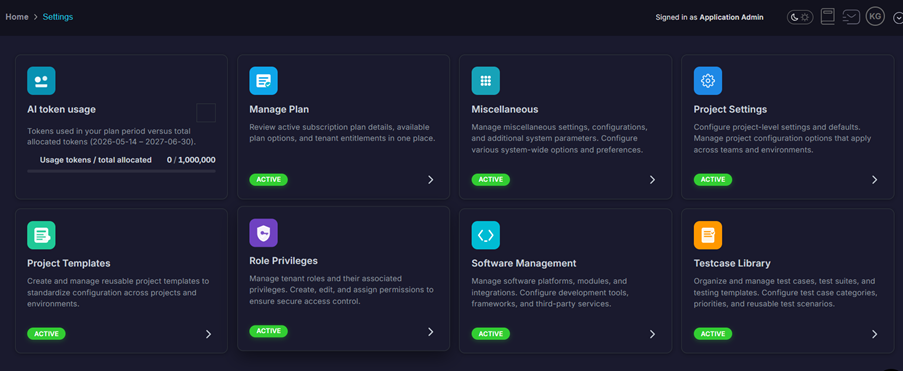
Click on the ‘Software Management’ tile to setup the Software details.
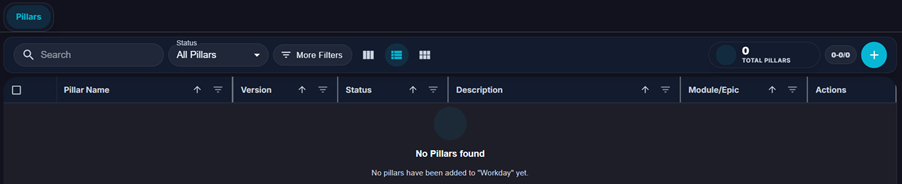
You will see a blank page initially since there has been no setup done.

Click on the icon to add a new Software in the Application.
The following page comes up. Use this to setup your Software details including Version and the Type of Software.
The Hierarchy that must be used for setup is Software -> Pillar -> Epic/Module.
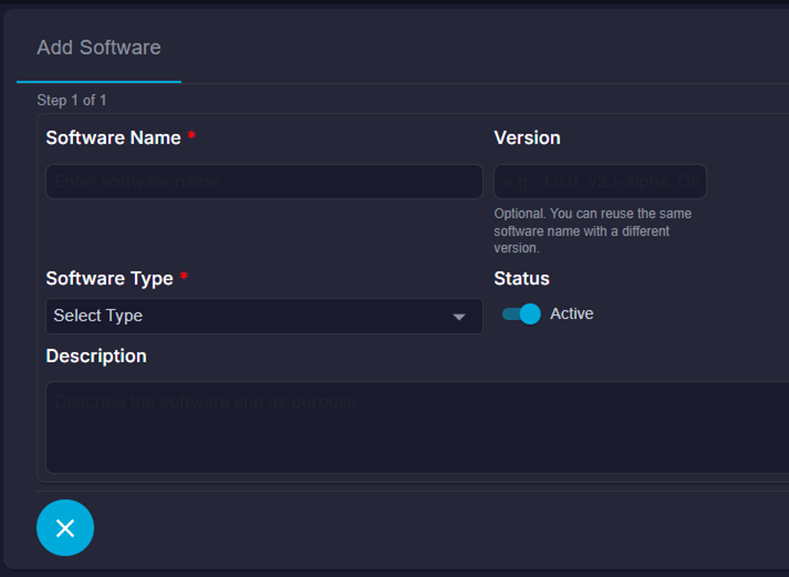
Fields marked with a ‘*’ are mandatory.
Click on the icon to save the entered details.
This way you can setup all the required Software necessary for your Projects.
From the Software list view, click on the ‘Software name’ to setup the Pillars under it.
In the same way click on the + symbol to create a Pillar.
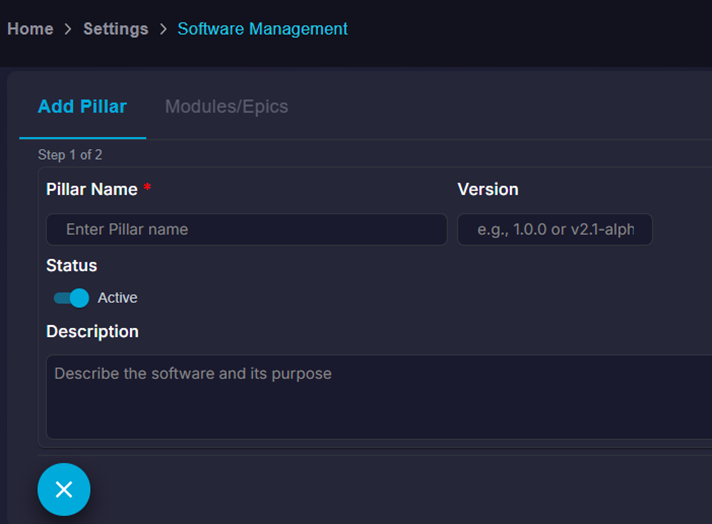
Finally click on the Save button to save the details.
Now you can setup the Epics/Modules associated with the Pillar in the screen below.
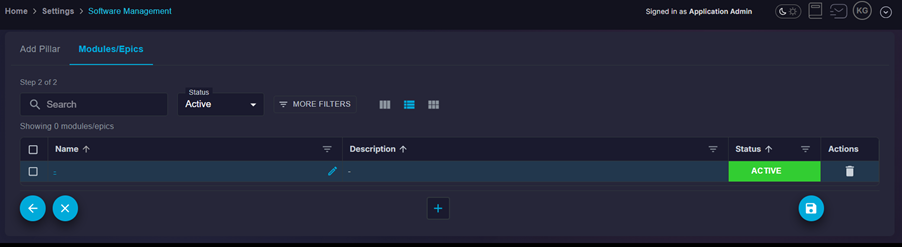
This completes manual setup of Software, Pillar and Module details.
You can setup L1/L2/L3 Business Processes manually by clicking on the Software for which you wish to set it up and selecting the ‘Business Processes’ tab.

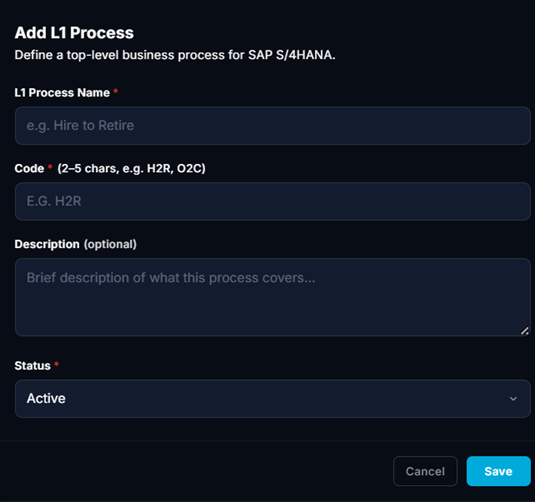
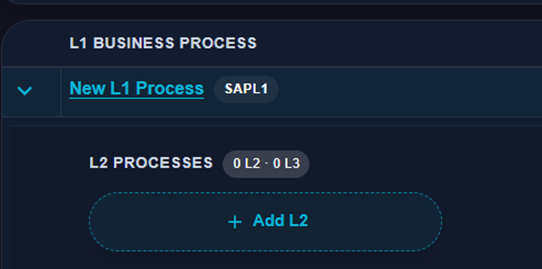
Click on the ‘+’ (Add) symbol to start adding a L1 Business Process
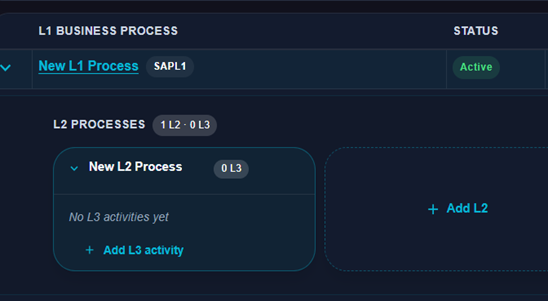
Once a L1 BP is setup you can ‘Add L2’ under it as shown below.
This way you can also setup the L3 details by clicking on the ‘Add L3 activity’ shown below.
Setting up using AI
You can also use the AI feature to setup the Pillar, Epics and Business Processes
Click on the “Generate Pillars & Epics using AI’ icon shown below

You will see the following screen.
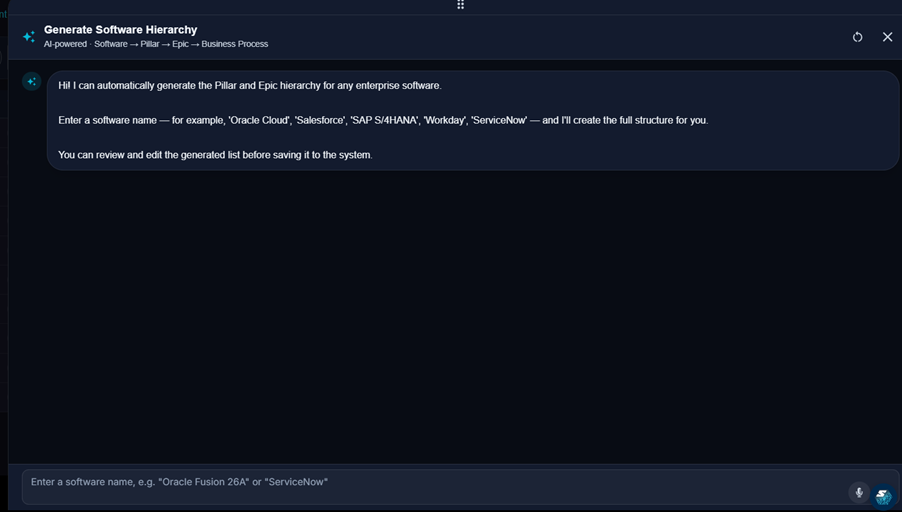
Input the Software Name and hit enter – say for example ‘SAP S/4HANA’.
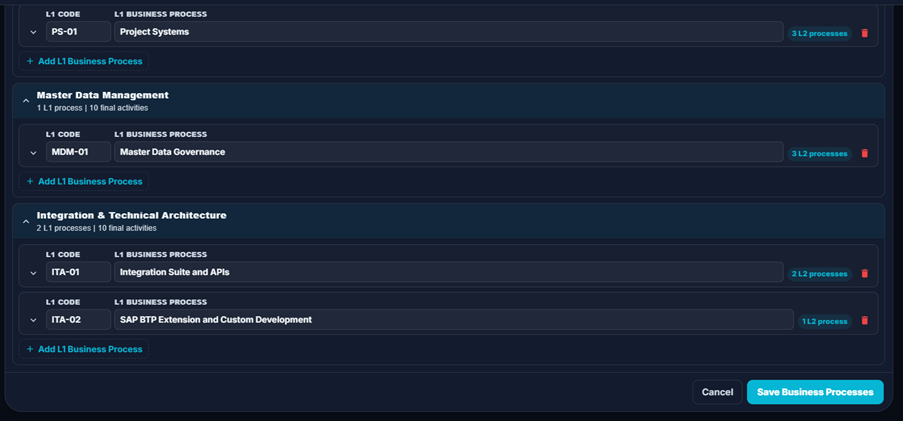
The AI model analyses the Software Application name provided and generates the required Pillars & Epics as below. User can add/modify or delete any of the generated details.
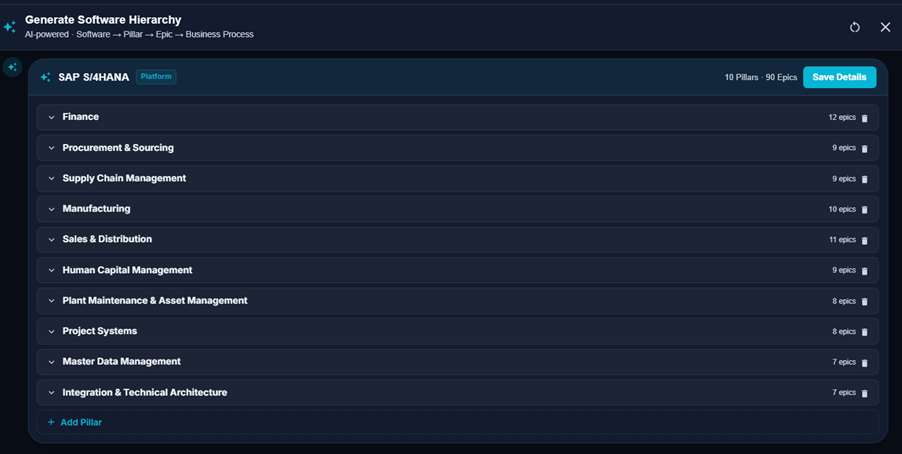
There is also an option to change the add/modify the generated details. Once the details are ready, user can click on the ‘Save Details’ button to save the Pillars & Epics.
The system then displays a toast message with the Pillars & Epics saved.
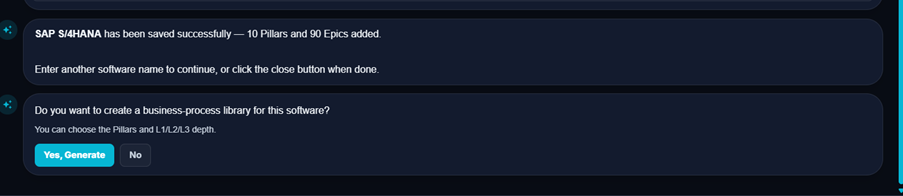
You can continue with the Business Process generation if you like. Select ‘Yes’.
User can choose a set of Pillars or all of them and proceed.
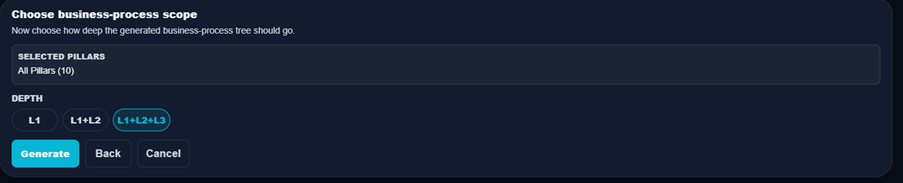
At this stage, the user can choose the Depth at which the Business Processes need to be generated, Either at L1 or L1 + L2 or L1 + L2 + L3
The option “L1 + L2 + L3” is selected by default. Clicking on generate starts the BP generation for the selected depth.

Once the details are generated, you can click on the ‘Save Business Processes” button.
This way you can add as many Software and their details using this process. You can close this window by clicking the ‘X’ (close) option and exit it.
You can also manually setup the L1/L2/L3 BP details by clicking on a particular Software and navigating to the “Business Processes” tab as shown below.

Click on the ‘Add L1 Process” and from here you can start the setup. It brings up this popup.
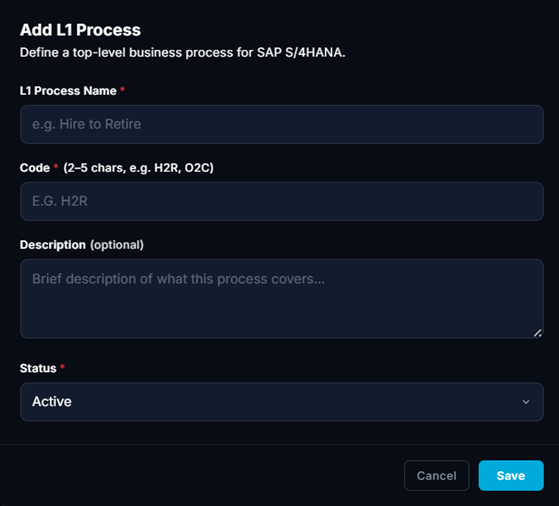
After a L1 process has been setup, you can create a L2 process under it and so on.

Configuring Miscellaneous details
Again click on the ‘Settings’ menu option in the Left Menu. Now select the ‘Miscellaneous’ tile.
You will see details as below
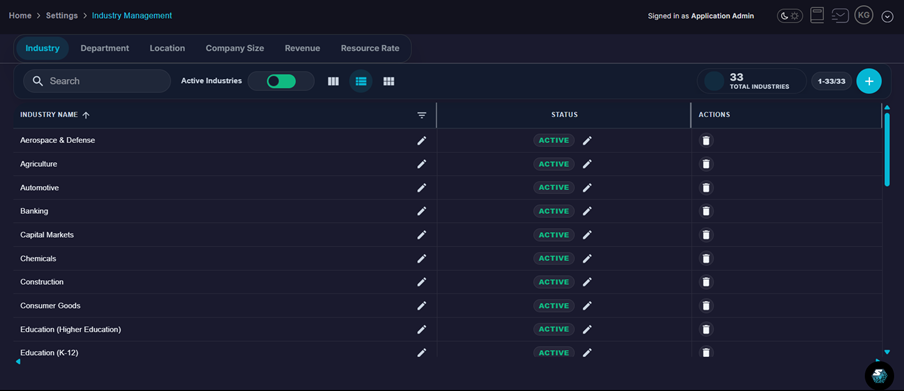
You will see the following details: –
- Industry
- Department
- Location
- Company Size
- Revenue
- Resource Rate
All of these, except Location, have defaults configured. You can review the details and add/update the required values.