Requirements Management Guide
User Guide
SaaSMap
Introduction
Requirements are a key feature in SaaSMap and form the foundation for capturing, organizing, and managing project needs effectively. The platform provides multiple ways to create requirements, giving users the flexibility to choose the approach that best fits their process and project stage.
Requirements can be created manually one at a time, AI-generated from a customer business discussion transcript, AI-generated from a Statement of Work (SOW), or imported from a pre-created list. This guide outlines these different methods and helps users understand how to create and manage requirements efficiently within SaaSMap
.
Creating Requirements
In order to create Project requirements, a Project must already have been created.
The Application admin, Project Manager and Developer roles have access to create requirements in a Project.
Navigate to the ‘Backlog’ tab within a Project and click on the ‘Add Requirements’ button.
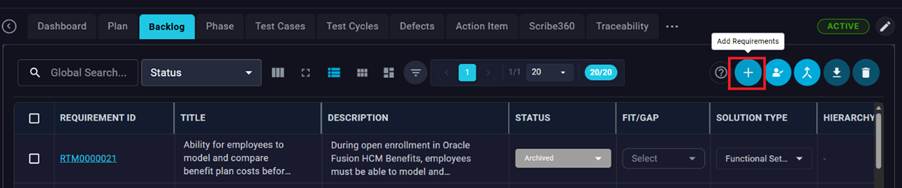
The following screen comes up.
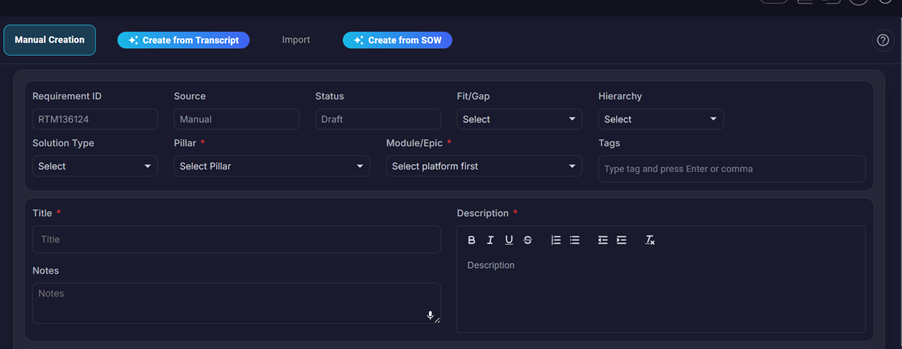
Requirements can be created in the following ways:-
- Manual Creation
- Create From Transcript
- Import
- Create from SOW
Manual Creation
For ‘Manual Creation’, system defaults the value of Requirement ID, Source and Status fields. The fields Pillar, Module/Epic, Title and Description are mandatory fields. After entering all the required fields, click on the ‘Save’ icon to create a requirement. At the Project level if the Requirement Type is set to ‘RTM’, then the requirement is saved as a RTM else its created as a User Story.
Pillar
The high-level software area or product suite the requirement belongs to (shown as Pillar on the Backlog and generated RTM rows—for example, HCM, SCM etc.). It comes from the project’s configured platforms and scopes which epics/modules are valid for that requirement. A project can have multiple pillars; each RTM row uses exactly one pillar so work is grouped by major application area.
Module
The functional area or epic within a pillar where the requirement is implemented (labelled Module in RTM export and often Epic/Module). It must be an epic configured under that pillar in the project—for example, Procurement under SCM or Core HR under HCM. Module ties each RTM to a specific backlog slice.
Hierarchy
Hierarchy classifies how a Backlog requirement relates to other requirements in the same project. It can be Blank (standalone, not in a parent/child structure), Parent (a container or umbrella requirement that can have children), or Child (a sub-requirement linked to a specific Parent via the parent requirement field). Use Parent for broad capabilities or work packages; use Child for detailed items that roll up to that parent. Requirements created from SOW are typically set to Parent and hierarchy is locked for those records.
Fit/Gap
Fit/Gap is a simple classification on each Backlog requirement: Fit means the need can be met with standard product capability (configuration, setup, or expected out-of-the-box behavior), and Gap means it needs something beyond that—customization, integration work, a policy exception, or another non-standard solution.
After entering all the necessary fields, click on the Save button to create a requirement using the ‘Manual Creation’ option.
Create from Transcript
Select the ‘Create from Transcript’ option to create requirements from a requirements transcript. The details are as shown below.
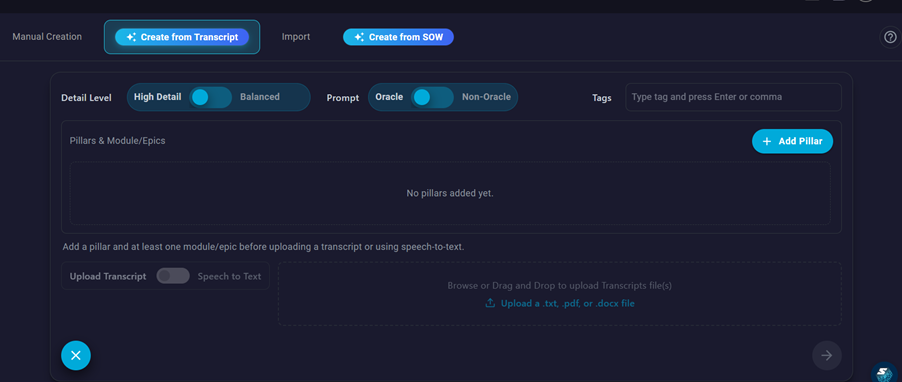
By default, the granularity of requirements is set to ‘High Detail’ , change it to ‘Balanced’, if you want coarse grain level requirements generated instead of fine grain ones. If the requirements transcripts are related to the Oracle software, then keep the prompt field set to ‘Oracle’ else set it to ‘Non-Oracle’. Add any tags that you want to add to the generated requirements.
Before uploading the transcript, it is mandatory to setup the Pillar and Module/Epic values.
User can also either upload a transcript (TXT, PDF or DOCX) or use the Speech to Text option. Below is a screenshot with all the values setup ready to analyse requirements.
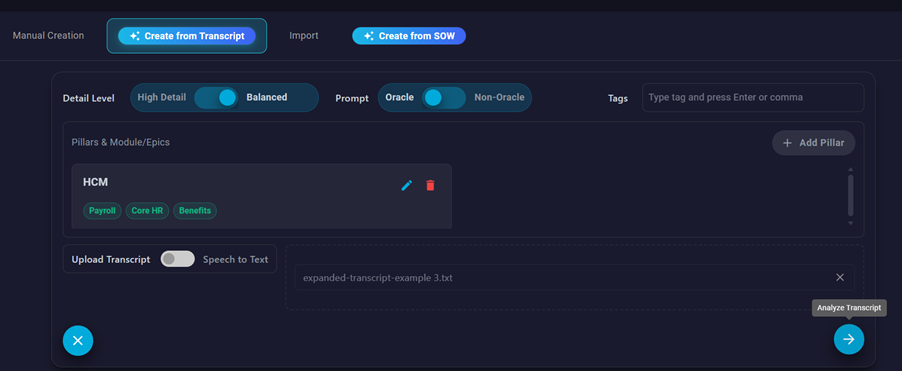
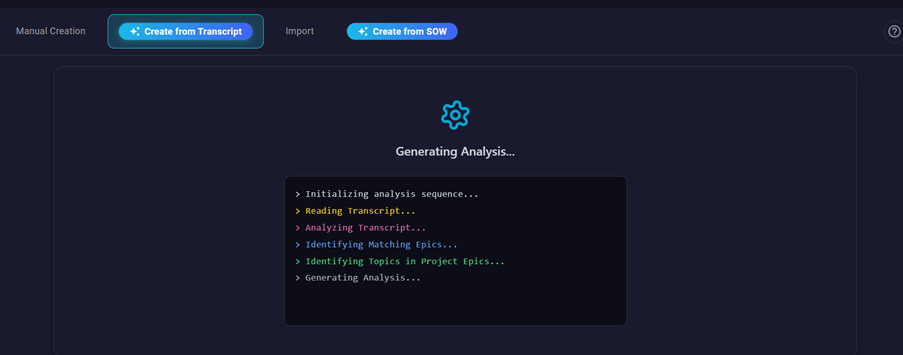
Clicking on the ‘Analyze Transcript’ as part of Step 1 the model reviews the transcript and groups it into topics mapped to the project epics and unrelated items (with summaries and supporting quotes). The app then moves to Step 2, where you review, select, or adjust those topics before generating full requirements. It does not create backlog records yet; it only structures and classifies the transcript for the generation step that follows.
Here is a screenshot with the analysis in progress.
Once the analysis is complete, you get to view the topics mapped to the Project epics, and Unrelated items. User can select or deselect topics of interest from the generated output.
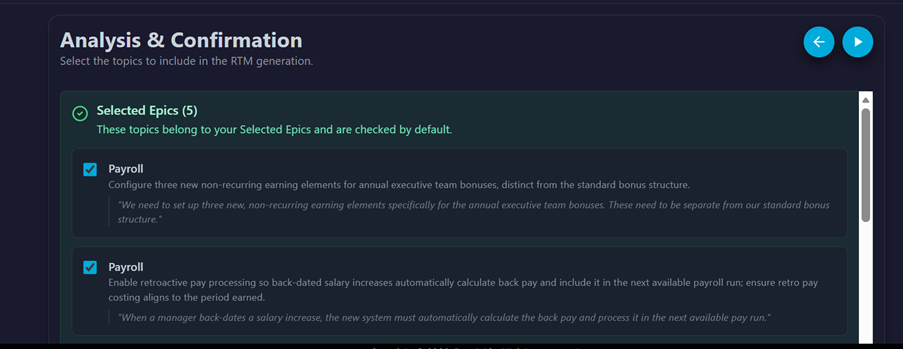
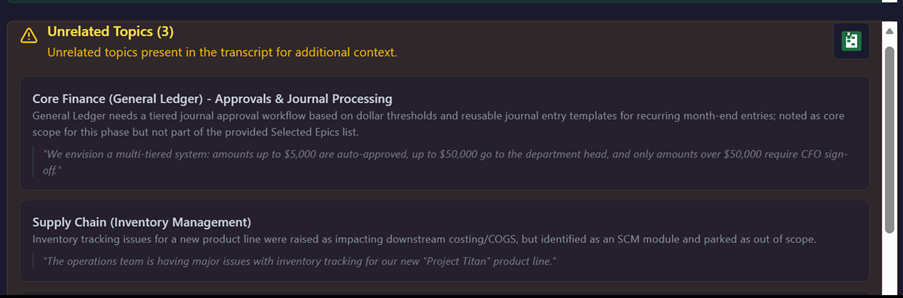
The Analysis also generates a list of Unrelated Topics – note that requirements cannot be generated for these topics. User can download this list as a Excel file.
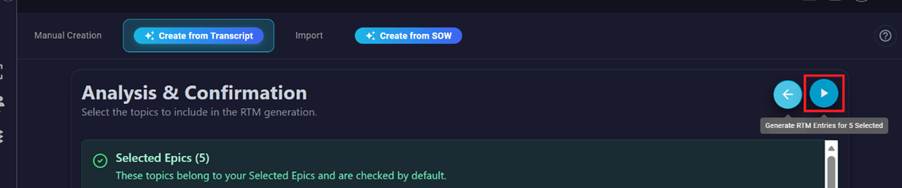
After the user is completed reviewing the analysis output, click on the ‘Generate’ button to generate the requirements.
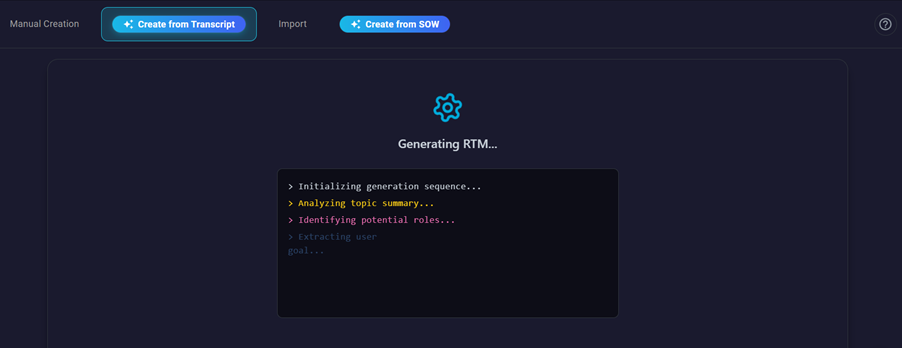
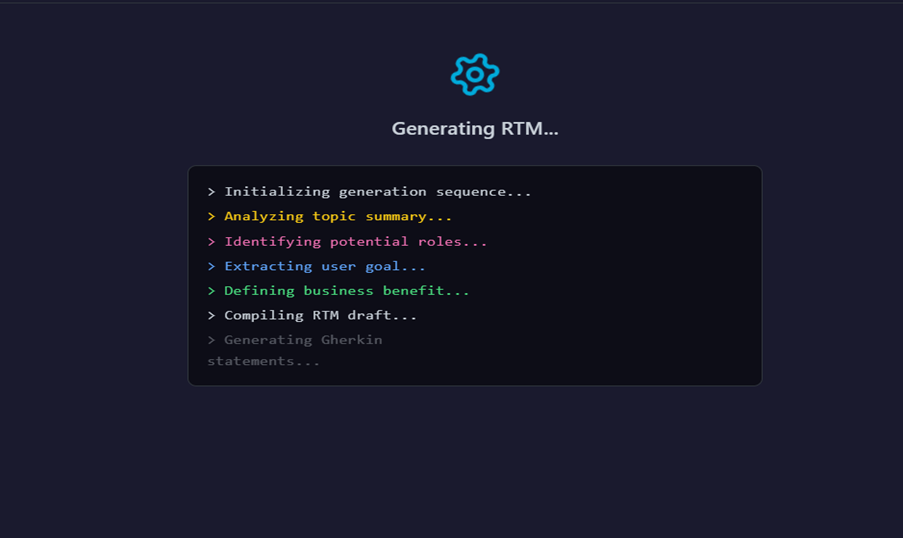
Below is a screenshot where the application is generating RTM’s.
After generation, user can view the generated RTM’s as shown below.
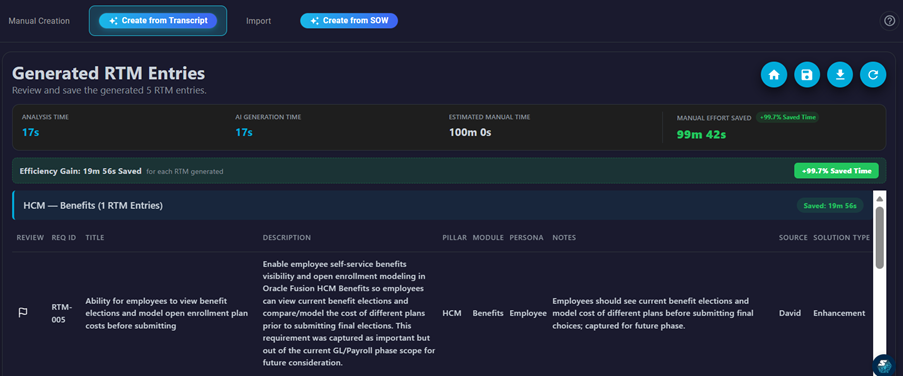
The buttons at the top allow you to
- Go back to Home screen
- Save the generated requirements to the Backlog
- Download the generated requirements as a Excel file
- Start/New Analysis
The generated requirements have the following attributes
- ID
- Title
- Description
- Pillar
- Module
- Persona
- Notes
- Source
- Solution Type
Persona
The primary business role that owns or performs the capability described by the RTM row (for example, “Payroll Specialist” or “AP Clerk”). It is one role per requirement—so ownership and testing context stays clear.
Notes
Supporting detail tied to the source material: for transcript-based RTMs, a short excerpt or paraphrase from the conversation that backs the requirement; for SOW-based RTMs, contractual references such as section, table, page, and interface/conversion IDs. Use Notes for traceability and audit context without repeating the full Description.
Source
Where the requirement came from — Manual or Transcript. It helps reviewers jump back to the exact moment or person in the recording or transcript that led to the RTM.
| Stored value | Typical meaning |
| Manual | Created via Manual Creation (user entered the requirement directly). |
| Transcript | Created via Create from Transcript (AI from meeting/text). |
| SOW | Created via Create from SOW (AI from statement of work). |
| Import | Created via Import (spreadsheet/upload). |
Solution Type
A single category from your tenant’s configured list (for example, Functional Setup, Workflow, Configuration, Conversion) that describes the nature of the work—not the epic/module. Each RTM row must pick exactly one allowed value so reporting and planning can group requirements by delivery type. Some examples are Configuration , Enhancement , Integration , Migration etc.
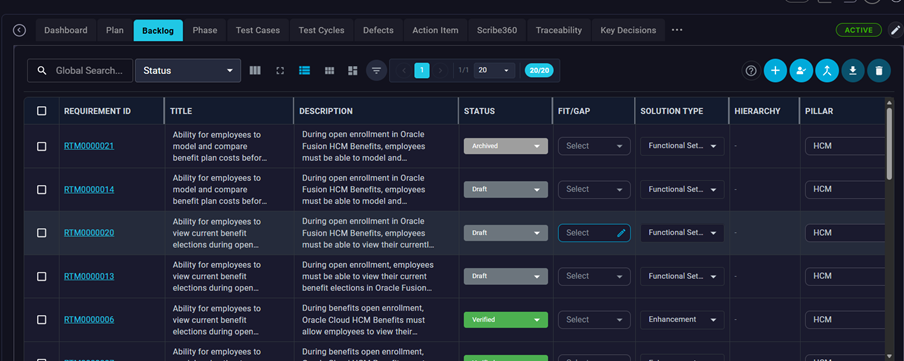
All the saved requirements are visible under the Backlog tab of the Project.
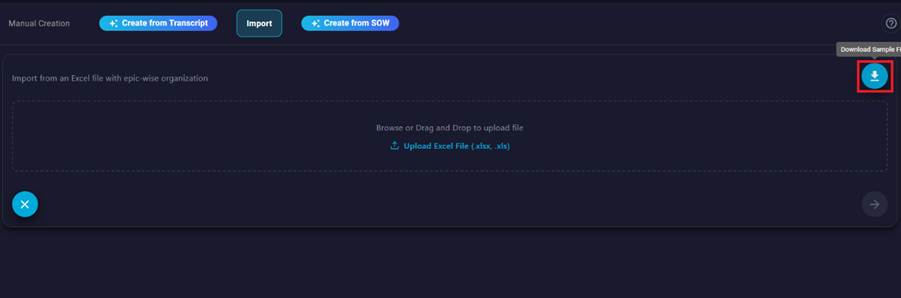
Importing Requirements from a Excel
The third option to create requirements is by uploading a Excel sheet with pre-filled requirements. This is available for both RTM’s and User Stories. Click on the ‘Download Sample File’ icon (shown below) to download a sample file. This can be used to fill out the requirement details and then uploaded into the application.
After successful import of requirements, you will find them under the Backlog tab.
Create from SOW
Requirements can also be generated from a Statement of Work (SOW) document. Such generated requirement are set as ‘Parent’ requirements. So the ‘Hierarchy’ value in such requirements is set to ‘Parent’. One of more child requirements can be linked to a Parent requirement.
Selecting the ‘Create from SOW’ option, brings up the screen below
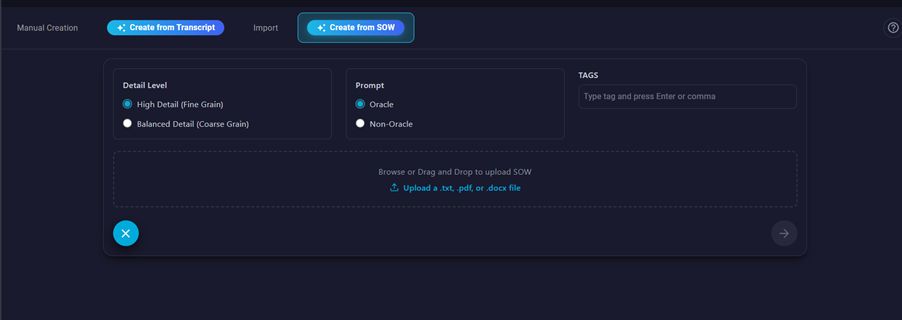
User can change the Detail Level depending on the level of granularity needed in the generated requirements. Continue to use the default ‘Prompt’ value of Oracle is you are working in Oracle based projects. By default all the Pillars and Epics in the Project will be selected and will be used to check the SOW content during the Requirements Analysis.
After uploading the SOW file, click on the “Analyze SOW” button to start the analysis.

The application does a Pre-Analysis check.
Pre-Analysis in Create from SOW runs right after you submit the SOW and settings, and before the main AI topic analysis starts. It is a quick validation step so Oracle vs Non-Oracle generation is not run on mismatched inputs.
The check compares three things: the prompt mode you chose (Oracle or Non-Oracle), what your project software/epics (pillars and modules) imply as the primary platform, and what the SOW document itself is mainly about (ignoring integration-only Oracle mentions). It also summarizes scope—pillars/modules, detail level, RTM vs User Story, and approximate SOW size.
If all three align, the flow continues automatically into full SOW analysis. If they do not, generation is blocked and you are asked to change the prompt selection, adjust pillars/modules, or upload a SOW that matches your intended platform—avoiding poor or inconsistent requirements from the wrong template.
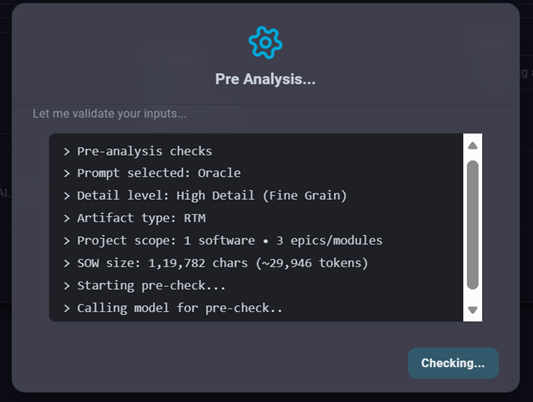
If Pre Analysis check succeeds, then the application starts the Analysis of the SOW
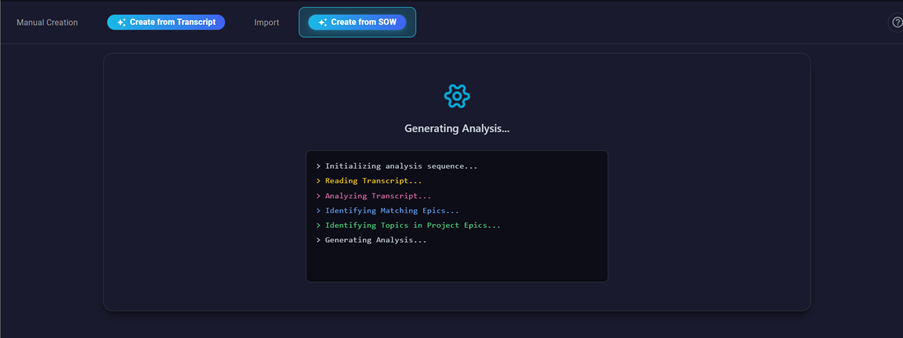
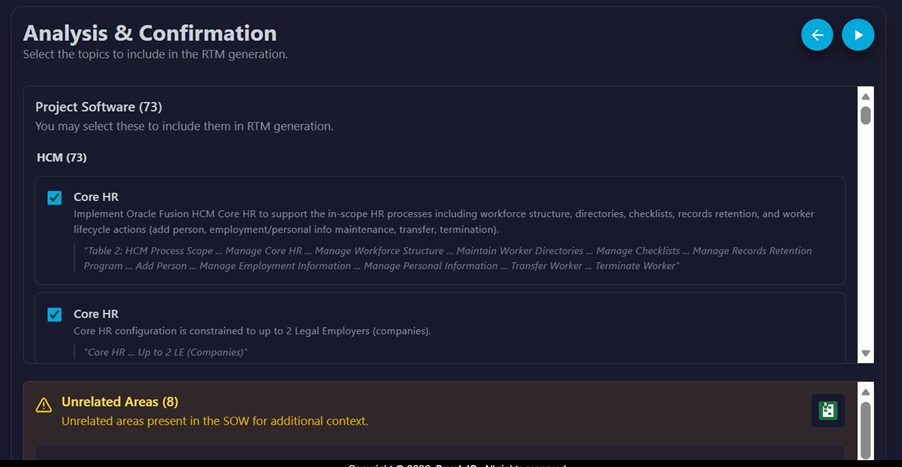
Once the Analysis completes, it generates a list of matching Project Topics and any Unrelated areas. This is similar to the output we have seen earlier in “Create from Transcript”.
Click on the Generate button as shown below to start the requirements Generation.

The application completes the requirements generation as shown below
Once done, you can view, save or download the generated requirements. The output is similar to what we get in “Create from Transcript” except that all the generated requirements are set as ‘Parent’ requirements. This is if they are auto generated from a SOW.
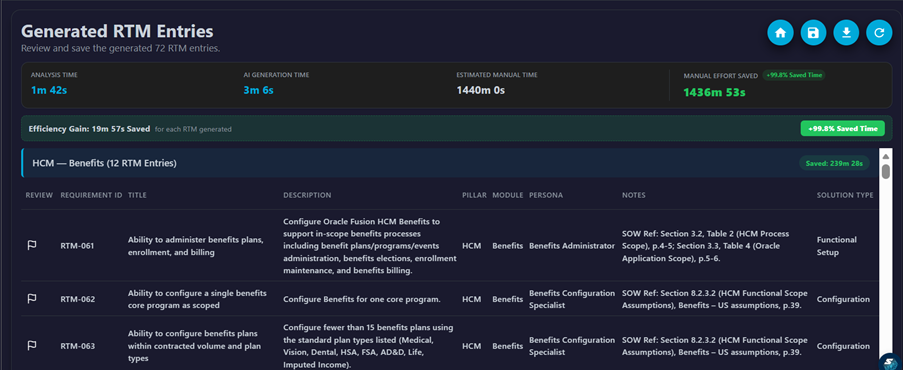
The application also displays the time savings – using the manual mode vs. the automatic requirements generation. In most cases there is a significant amount of time savings and improved accuracy.